LITEsurf
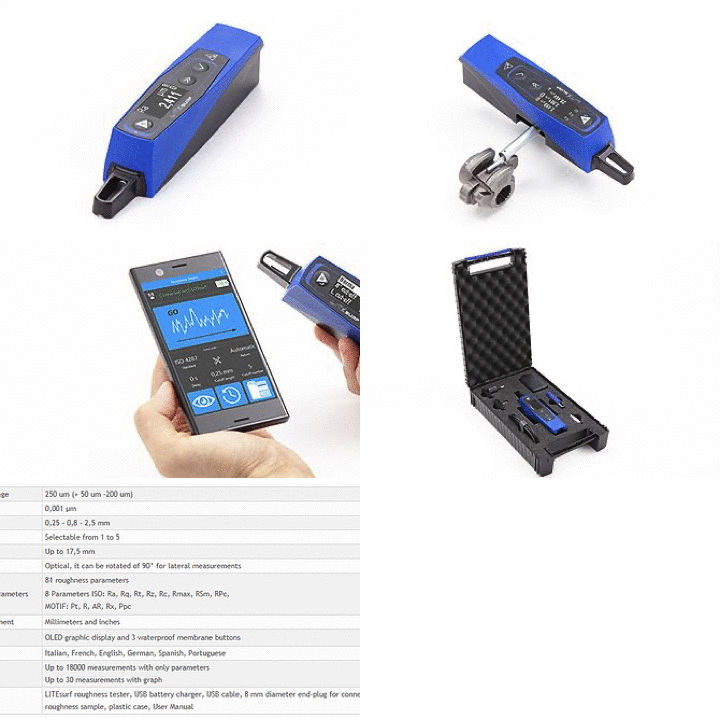
The new LITEsurf roughness tester was born from the forty-year experience that SM has in measuring and designing roughness tester for production areas. This is why we know well what are the characteristics that are really necessary for an instrument of this family that has to go to work there right with you: compactness, robustness, ease of use and clarity of the results, these are the characteristics that they will make LITEsurf the ideal partner for roughness characterizing on your parts. Are you considering buying a new palmtop roughness tester? We accept the challenge, because we are sure that the new LITEsurf roughness tester is a step forward compared to the other opponents! Are you not convinced? We give you 5 good reasons!
Connectivity: Today technology allows us to share information quickly and easily, can your new roughness tester do it? The new LITEsurf, thanks to the integrated Bluetooth and USB connection, allows you to connect the smartphones, tablets and PCs in an intuitive and fast way, then sharing information with the rest of the world.
Flexibility: you want, with a single instrument, to measure zones horizontally, vertically, up / down or sideways, many will answer you impossible, but LITEsurf can do all this. Through the probe rotatable laterally by 90 ° and to the balanced and preloaded sensor, each area of the piece can be measured.
Robustness: A robust palmtop roughness tester with few plastic and a lot of metal? Difficult to find on the market you will think. But is not so! The LITEsurf has a light alloy body machined from solid combined with a PC / ABS body that guarantee high rigidity with high impact resistance. The tool that is not afraid of the bumps and accidental falls inevitable in normal use in production.
Reporting: Do you need to generate customized reports with company logo, description, notes and even a photo of the measured detail and save them in a standard format such as in PDF or Excel for easy sharing and archiving? Many will offer you additional paid software and perhaps not so flexible; LITEsurf by connecting to an external device such as your Smartphone or tablet on which the free "Roughness studio base" APP is installed, can do all this with ease.
Battery life: How often are battery-powered devices discharged just when they are needed? We as you know it well, for this reason a sophisticated charge management system has been integrated into the LITEsurf which performs a full charge in 50 minutes, guaranteeing 10 hours of work and at least 300 roughness measurements. Don't you have this time? Just give us 3 minutes of charge and we guarantee you to perform at least 20 measurements.
The LITEsurf is charged via the same cable and charger that you use to charge your Smartphone or Tablet (USB type C), a nice simplification!
The instrument can analyze surface features along with dimensional ones, thanks to the interchangeable styluses for both roughness and profilometry.
RT10
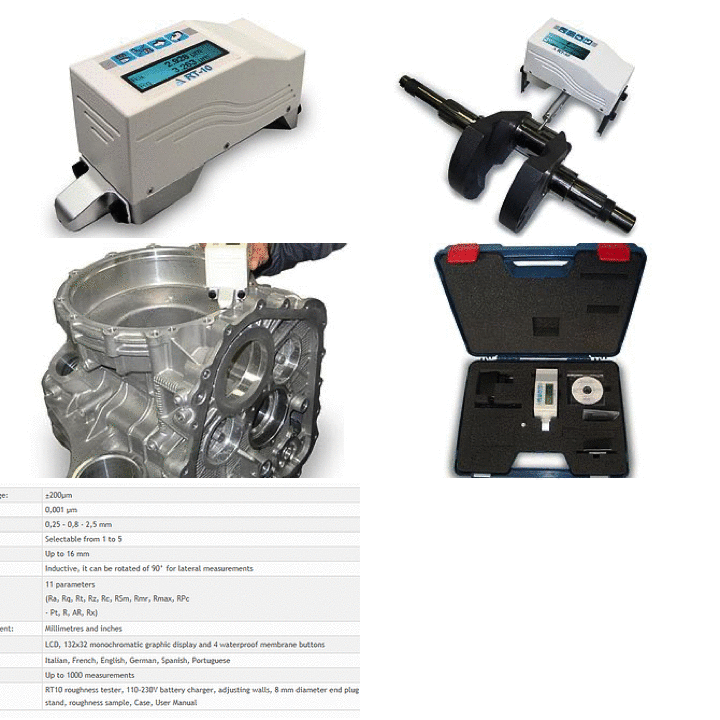
RT10 roughness tester is the basic tester of the range. This instrument is ideal to measure pieces directly on work stations or production machinery. Thanks to its simplicity of use, it is ideal for the simple numeric characterisation of the roughness of an object and boasts quick testing times. Thanks to the internal memory, simple handling and integrated battery, RT10 is ideal for taking measurements in difficult conditions, like in case of bulky or complex pieces.
RT10 Plus (code 1.101). RT10 roughness tester is also available in the Plus version which features a plug-in connector that allows to interchange the pick-up, thus being able to take measurements on all types of surfaces, by simply mounting the most suitable pick-up.
RT10G
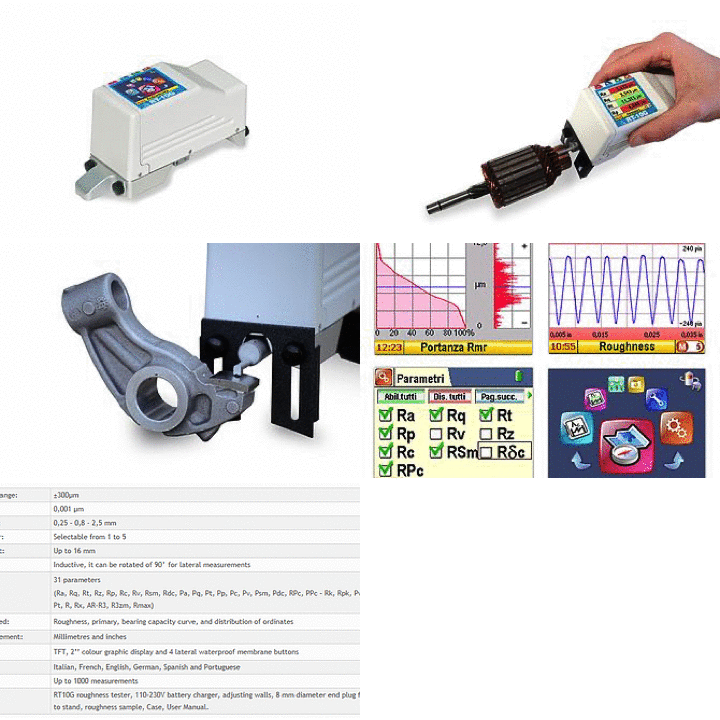
RT10G roughness tester was born from the success obtained by RT10; easy to handle and reliable like the basic version, it also carries out advanced analyses typical of a laboratory instrument.
In addition to 31 roughness parameters calculated, RT10G displays the graphs of the roughness profile, primary profile, bearing capacity curves, distribution of ordinates, and allows to set tolerances on single parameters and personalize prints. RT10G uses new generation electronics with 0.001 µm resolution that ensure always reliable results and displays them in a user-friendly fashion, thanks to the internal icon menus taken from modern Smartphones.
RTP80
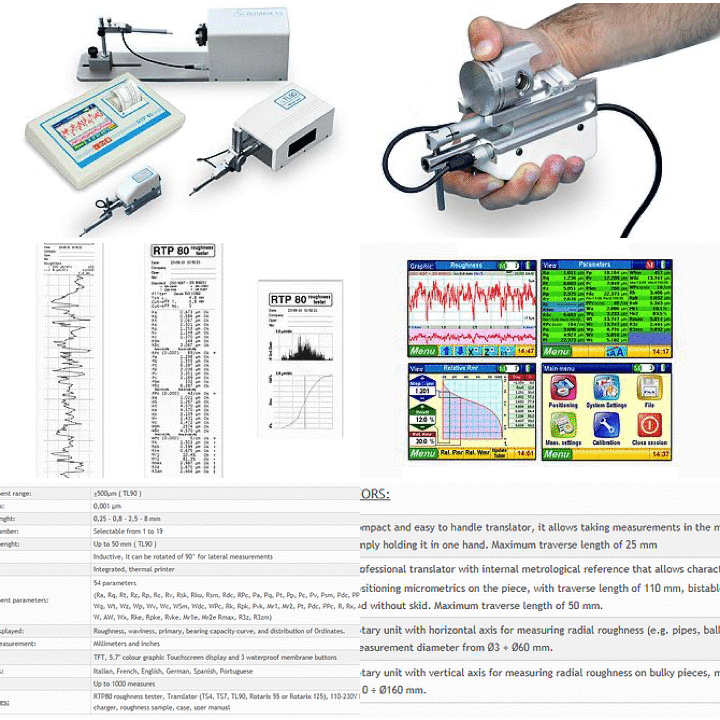
RTP80 roughness tester, easy to handle and user-friendly, allows to characterize even the most complex surfaces, easily and conveniently. The shiny 5.7’’ colour touchscreen display combined to the icon interface, allows the operator to set the measurement parameters, moving on the piece and carrying out the analysis quickly. The results obtained and the relative tolerances can be printed immediately using the thermal printer built in the instrument. The graphs and parameters are all of interactive type, to allow the operator to choose how to present the results. RTP80 is suitable for production departments, where the measurement settings for batch analyses can be protected by password, and it is also ideal to be used in metrological laboratories where statistical analyses can be carried out on the measurements taken. RTP80 calculation unit can be connected up to 4 measurement translators for various types of pieces.
RT90G
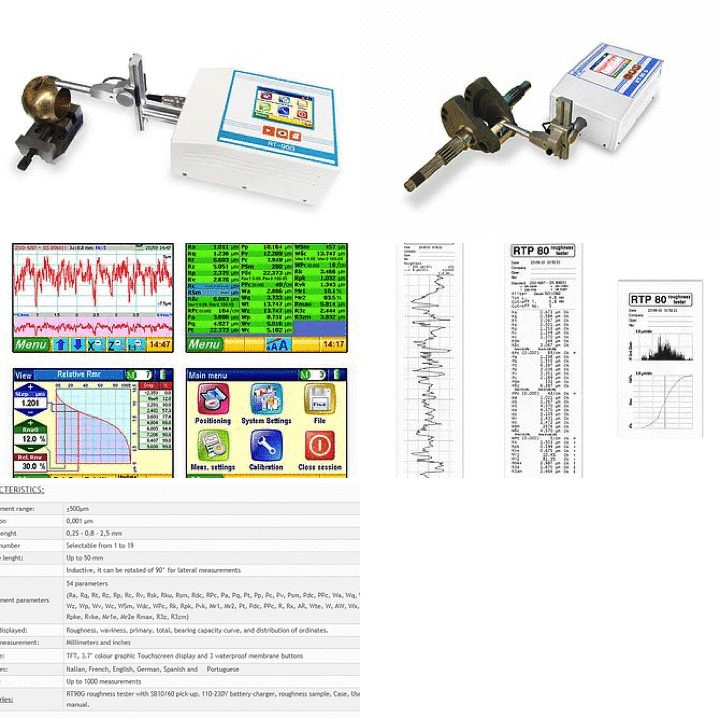
RT90G roughness tester is unique in its category because it features a built-in calculation unit and measurement procedure, thus being the first ''All-in-one’’ roughness tester. Extremely compact and easy to handle, it conveniently allows positioning also on large size pieces, thanks to built-in micrometrics with 100 mm range. The shiny 3.7’’ colour touchscreen display combined to the icon interface, allows the operator to set the measurement parameters, moving on the piece and carrying out the analysis quickly. The results obtained and the relative tolerances are immediately displayed and can be downloaded on PC or printer using the external printer. The internal reference allows to perform analyses also on W waviness parameters, while the bistable pick-up holder allows measuring with one simple gesture, with or without skid, as required.
RT120
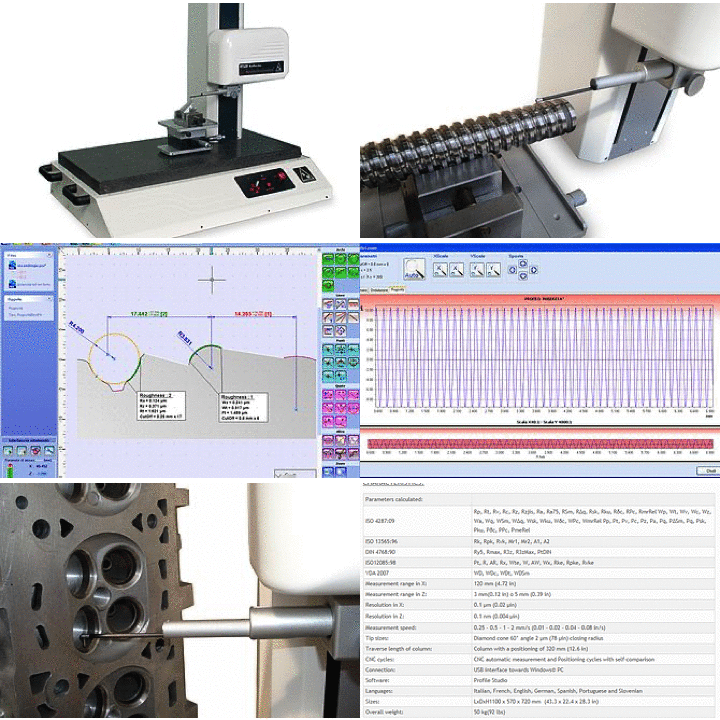
RT120 was conceived from the need to characterise roughness and micro-profiles on pieces, even complex ones, using one device, thanks to the RT120 “all-in-one” logic and Profile Studio analysis software. Profile Studio software was developed to be extremely user friendly and easy to use by the operator; all functions required for the characterization of the profile and roughness are available in the right toolbar and divided into categories, each one featuring a different colour. New dimensions and roughness analyses can be input on the same profile and displayed on the same screen, in order to allow the operator to carry out a complete analysis of the piece, with one single measurement. Thanks to the self-comparing function, it is possible to reconstruct all dimensions and dimensional tolerances of a reference profile on a new profile, thus saving a considerable amount of time for the check in series. The roughness parameters are elaborated according to the most recent standards like ISO 4287, ISO 13565-1 and -2, ISO 12085, VDA 2007 for a total of 70 parameters calculated.
WARPsurf
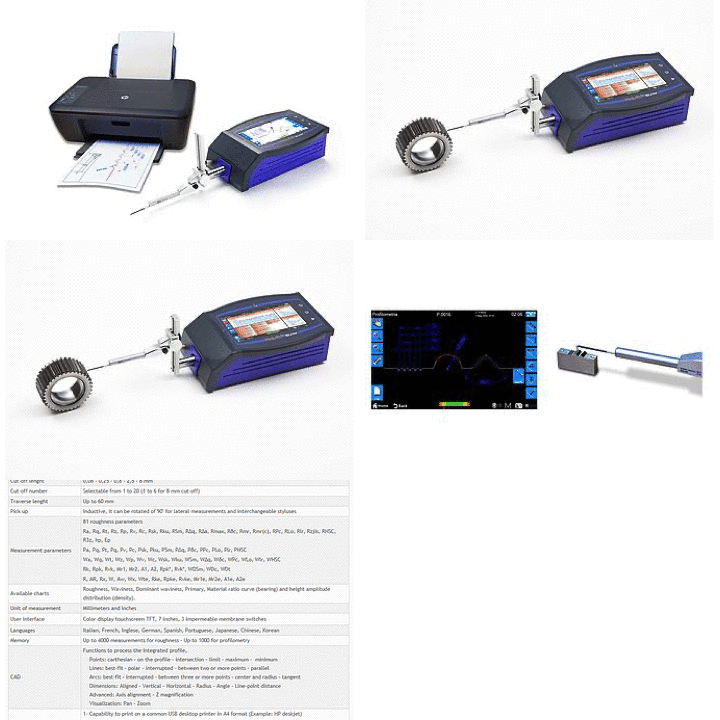
The WARPsurf is a turning point in the world panorama of the instruments for surface analysis, because it gives in a single portable instrument the capability to perform both roughness and profilometry analysis.
The brilliant 7’’ touch screen display, combined with modern user interface, allows the user to become quickly familiar with the instrument, setting easily the measure parameters, positioning on the piece and performing the analysis.
The instrument is equipped with a 1GHz microprocessor that allows to have a fluid system and fast processing even with complex profiles.
Extremely compact and handy, the WARPsurf allows to position easily on big pieces thanks to the integrated micrometric that covers 110 mm range.
Thanks to the standard USB interface, it is possible to plug a regular USB drive to save images or PDF reports; using this interface the instrument can connect to a common desktop printer and directly print on A4.
The instrument can analyze surface features along with dimensional ones, thanks to the interchangeable styluses for both roughness and profilometry.
SW Measurement Studio
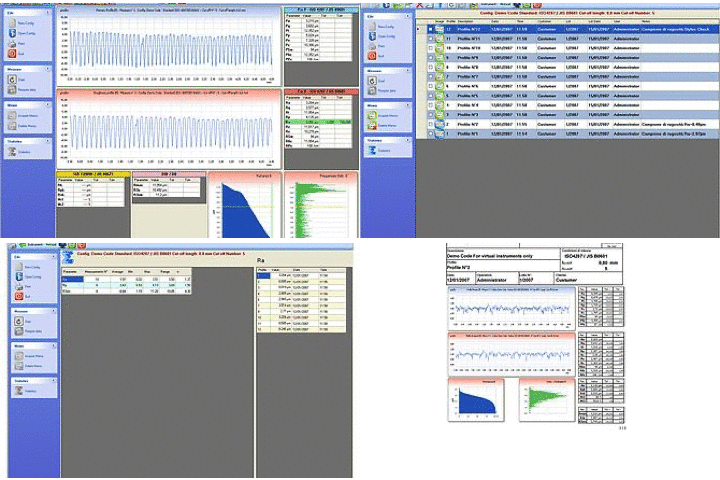
Measurement Studio program was conceived as external interface for the elaboration of data measured by portable SM roughness testers, and specifically, it can be connected to: RT10, RT10G, RTP80 and RT90. Thanks to the use of simple and clear icons, the operator is assisted in using all storing, checking and statistic functions on the measured data.
The main functions of Measurement Studio software are:
- Possibility to remotely launch the measurement through PC and request data from the roughness tester.
- Download the stored data in the instrument’s internal memory and file it in the PC
- Organize the measurements within a database, according to codes, measurement sessions, operators.
- Preconfigure a specific set of measurement parameters for each code, in order to remotely set-up the instrument according to the piece to be measured, thus saving measurement set-ups, tolerances and system’s variables.
- Visualize the measurement results in graphs or tables, selecting the parameters and graphs to check the roughness profile, waviness, primary profile, bearing capacity curve and main waviness, with a simple click.
- Perform statistical analyses on a specific set of measurements or on the entire batch, to identify the statistical analyses of that value, on each single roughness parameter.
- Print the measurement reports, roughness, waviness, primary profile, bearing capacity curve graphs, and statistical analysis reports in A4 format.
All reports can be personalized and edited, to ensure utmost flexibility.
Two versions of the Measurement Studio software are available:
- Measurement Studio Lite version (code 1.403) that allows to connect to roughness testers RT10 and RT10G.
- - Measurement Studio Full version (code 1.404) that allows to connect to all manufactured roughness testers (RT10- RT10G - RT90 – RTP80) and, compared to the Lite version, it allows to perform analyses on parameters and waviness profile (if it can be calculated) and the parameters indicated in VDA 2007 standard, determining the main waviness.
